This builder grade bathroom desperately needed an update to fit in with the style of the rest of this little rambler. I decided the biggest difference could be made in the shower. So I learned how to paint shower tiles white so I could save a ton of money on demo and new tiles!
Here are some more bathroom posts to read on Petite Modern Life!
- How to Paint Shower Tiles White!
- Easy DIY Concrete Counters
- European Farmhouse Bathroom Tiles
- Gorgeous Farmhouse Bathroom Vanities
- European Farmhouse Bathroom Sinks on Amazon!
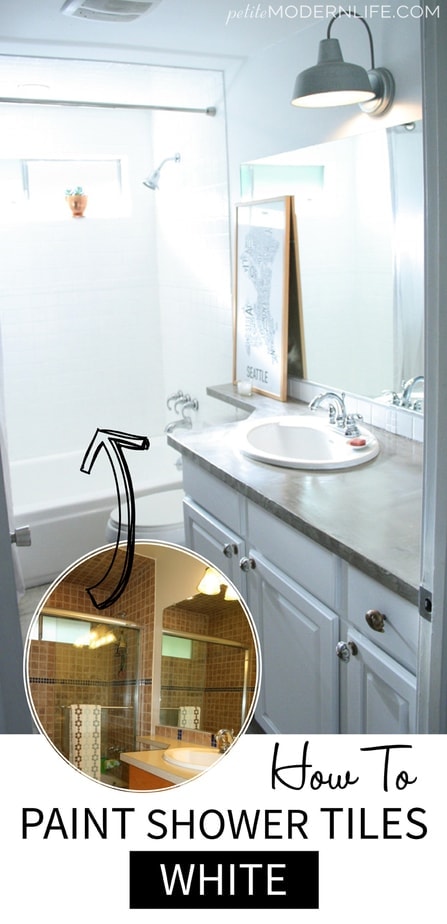
Now, truthfully, the bathroom really wasn’t horrendous. Ok, maybe the vanity situation was an eyesore, but the shower itself waaas ok. But not for me! It just didn’t fulfill my “white bathroom vision.” At some point I weighed my options of what I could do to have a white or whitish bathroom.

Ugly shower tile finish options
- I could tear out the tile.. But that would damage a lot of dry wall and be a terrible mess. Then I’d have to pay for new tile quickly so we could use the bathroom again.
- I could replace just the accent strip of tile and leave the brown ones. Then I’d have to hokey pokey around with choosing sizes and the right color.
- I could find some way in the world to paint over the whole thing white.
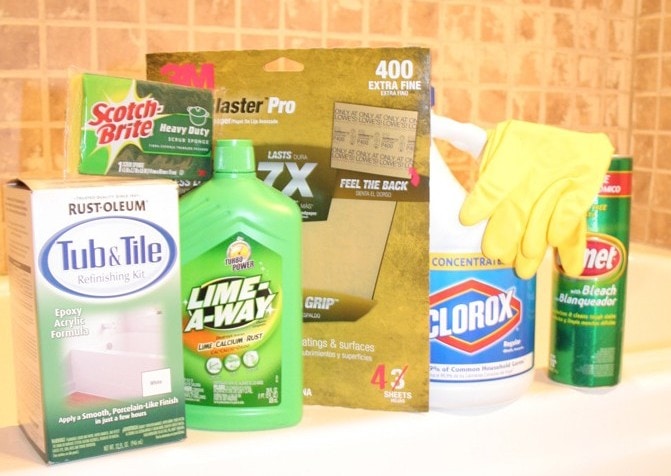
Between Mr. G, our bank account, and I, option three sounded the best. So I did some research and found a product called Rust-Oleum Tub And Tile Refinishing 2-Part Kit. After reading the reviews carefully and checking the blog world, I thought $64 (2 kits) sounded like a legitimate way to makeover our bathroom shower.
Unfortunately, this product apparently can’t be found in store anywhere (I called at least 5 places in my area), so I had to order through Amazon and wait a week for it to ship to me. Talk about impatient! I wanted to start the moment I learned it was possible! (Me with every project except laundry and weeding…)
So if you’re like me and need to start on some part of “that next awesome project,” this one has some “great” prep work to be done. So prepare to “have fun.” (The below steps are what they prescribe on the box directions and how they worked best for me.)
Preparing to paint shower tiles white
First we removed the glass doors. I don’t like cleaning glass! A shower curtain will look cuter and provide some guest bath privacy for kids someday.
1. Clean off glue and caulk:
With your x-acto/utility Knife and flat head screwdriver (and maybe a small hammer) you’ll need to scrape or lightly chisel off the glue residue until clean as possible. Remove all the caulking between the bathtub and tiles.
This takes some time and patience. Have your vacuum nearby to suck up the dust and glue. I tried using sand paper to get the glue out of the grout cracks, but the x-acto knife did a much better job. (Don’t think the intense cleaning later will get the glue and caulk out either, it’s all in the x-acto knife.)
Sand down the tiles and grout with ~200 then 400 grit paper to remove lingering debris. You can tell that the previous tile installers had smeared the grout poorly and got it on the tiles. I left it there, deciding to just paint over it and get a rough look on some of the shower. This is also a good time to fix any grout that has crumbled away.
**The glue and caulk removing phase took a long afternoon to accomplish. So you might want to set a day aside for it in itself.
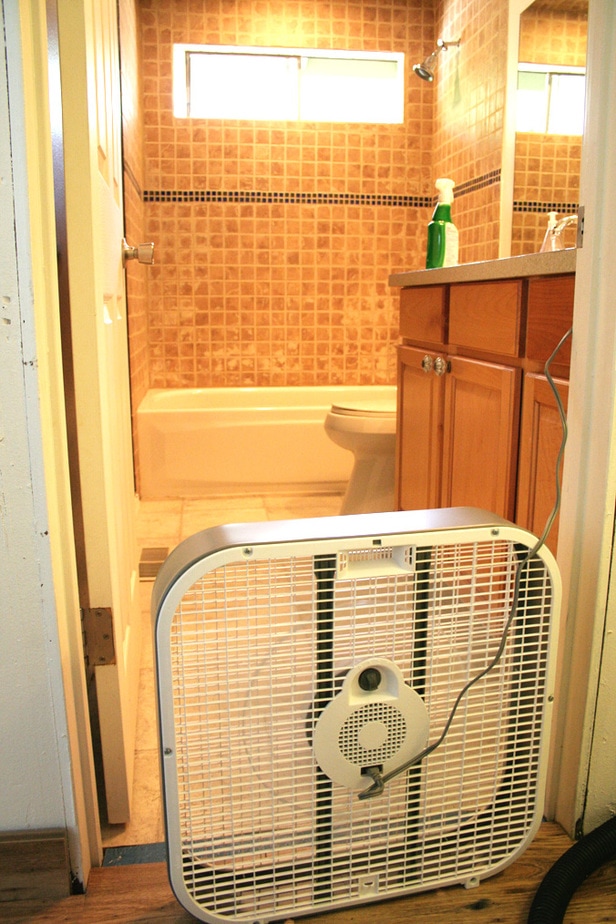
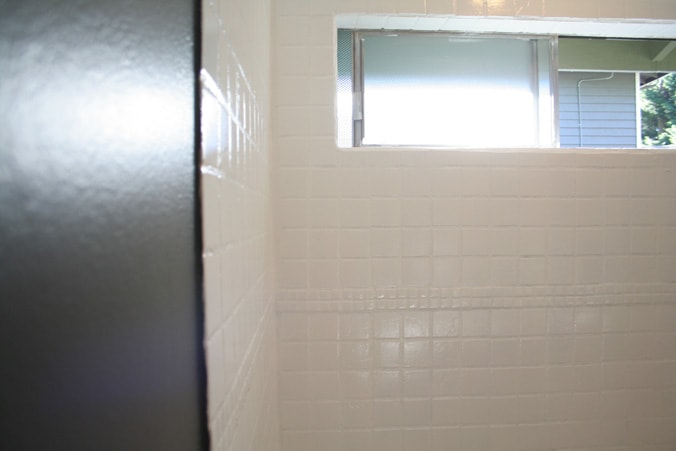
2. Create Airflow and Mask Up
Once you’re done cleaning out the glue and caulk, it’s time to open the window and set up your fan. I picked this one up at target from under $20. Also, it may be time to don one of these…
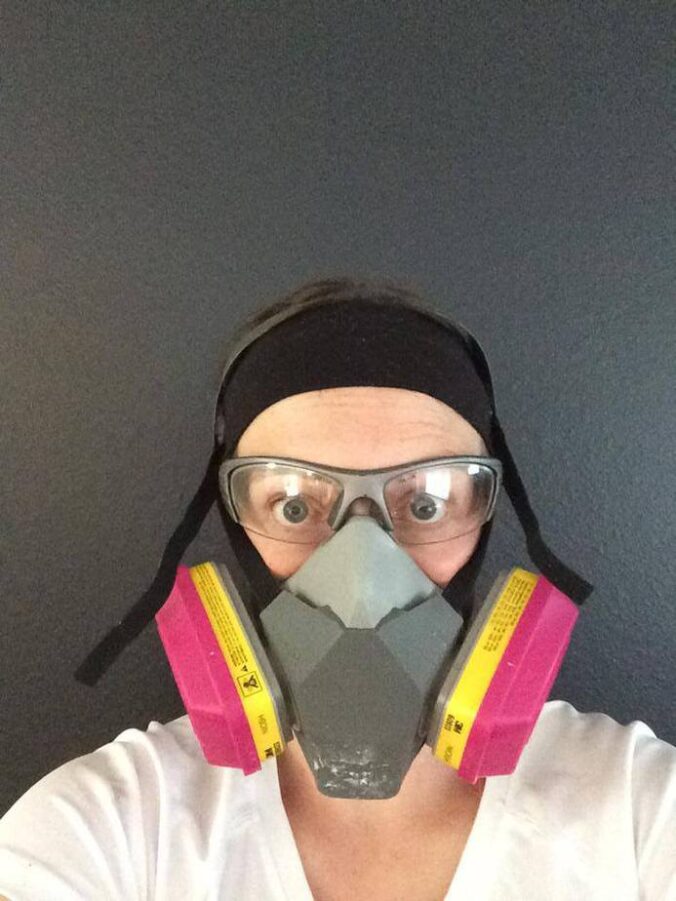
This is a 3M Professional Multi-Purpose Respirator that you will DEFINITELY need for the painting process (even though the box doesn’t say to get one, please please, for your brain cells and nervous system, do.) While I was cleaning with multiple harsh chemicals, I thought it a good idea to wear it then too. Sure I kinda look like this guy, but at least it’s in pink. ;)
3. Thoroughly clean the tile surfaces.
The cleaning steps are to insure that the paint will adhere well when applied. So though these aren’t the favorite household cleaners these days, I don’t think you should skimp or exchange any of them. Don your rubber gloves & mask, open your new abrasive scrubber, lock the kids and pets out, turn on the fan, and get to work.
1. Vacuum the tub of dust and hairs. Rinse.
2. Apply bleach, scrub, rinse thoroughly. (…I should’ve taken a picture as proof, but I totally pulled my garden hose through the window to spray down ALL the tiles, including ceiling. It was the equivalent of a rain forest in the bathroom for about 45 minutes…)
3. Next, spread Comet across the tiles and scrub away. Rinse thoroughly.
4. Finally, spread LimeAway across the tiles and let sit 5 minutes. Scrub. Rinse thoroughly.
5. Let dry for at least 90 minutes before painting. ( I towel dried too.)
4. Gather supplies and tape area
- Purchase throw away small-medium size cheap paint brushes and a a few high density foam rollers.
- Shut the bathroom door, open up the windows, turn on the fan and open up windows in the house. Don’t do this around small children who can’t stay out of the fumes. The fumes will linger for a few days.
- Cover or tape off any surfaces you might splatter on, this paint won’t come off without a fight.
5. Begin Painting
- Keeping your gloves and mask on, shake the activator and base cans up to mix well and then poor them into your paint tray. When mixed, the paint looks very watery, but goes on like solid glue.
- The grout is tricky to cover, that’s where I used a brush the most. Using your roller, go in one direction consistently feathering your edges. If you allow a paint dribble it will show bad when it dries.
- This paint dries fast. You can touch up spots easily in subsequent coats. In between the first and second coat wait about 2 hours for it to dry.
- Wrap your paint and brushes super well with plastic wrap in between coats. The can says to wait a day before the 3rd coat, but to not let your mixed paint sit out for more than 6 hours. If you’re not sure how much paint you’ll need, the can shows the ratios to mix if you want to leave some unmixed in the can for a later day.
For all my tile I did 3 coats + 1 touch up session and used almost 2 full kits. Layer three ultimately covered up the previous tile color.
Tada!
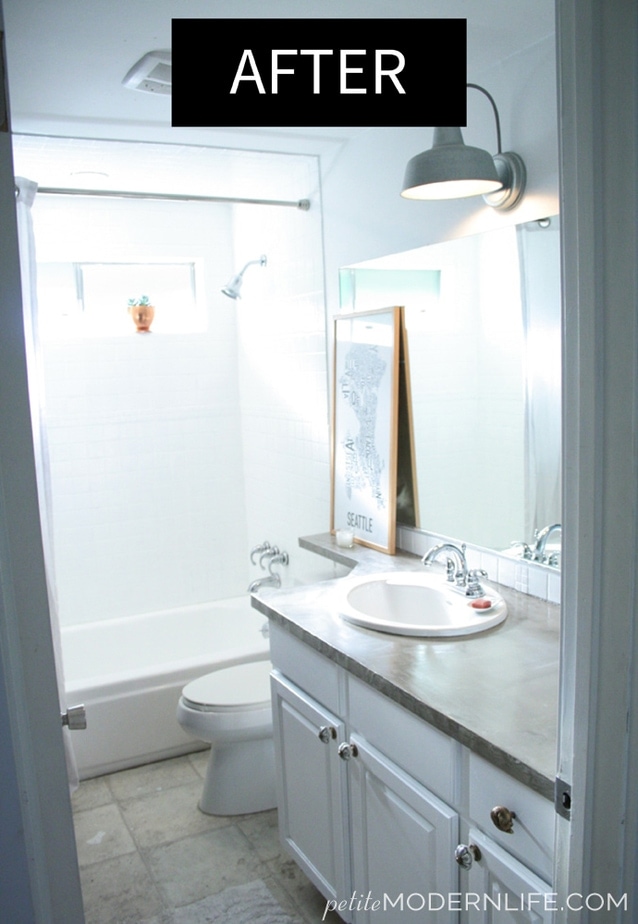
(After painting the tiles we realized that the tub was biscuit rather than white, so I bought another kit and used half of it’s contents to repaint ~2 coats on the tub. I’m saving the second half of the kit to touch up the tiles behind our new concrete counter that is in the works! (Check back next Wednesday to see how we did it and what we learned!) It was hard to get a distinctive before and after picture of the bathtub with all the surrounding white, but I’m grateful for that because it disguises any brush blemishes I may have.
Here is the new tile against my accent wall.
I can’t wait to get new tile floors and finish the counter and cabinet! I’m in love with the process and results thus far, I hope you enjoy the painted shower tiles too. If you have any questions shoot them my way!


Leigh Anne says
This looks fantastic! I can’t wait to see the rest!
Petite Modern Life says
Thank you Leigh Anne!
Petite Modern Life says
Thanks for sharing! I’m looking into all my options for those cabinets and gel stain is one! I just checked it out on your blog :) Thanks for stopping by!
josh says
Nice work!
Petite Modern Life says
Thank you Señor Berg!
Kim says
That is awesome! I have a pepto- colored bathtub and that would save so much!
Petite Modern Life says
It would look awesome! Yay new tile life!
Erica says
this looks SO GOOD. I’m also glad you didn’t lose too many brain cells in the process ;) can’t wait for more updates!
Petite Modern Life says
“too many,” now I have an extra excuse in my back pocket for when I forget where I put things haha ;)
Sarah @ Little Red Brick House says
Oh my gosh, Karisa! This looks fantastic. From the FB picture I thought you had installed all new tile. It looks soooo good! You guys are doing a beautiful job on your home and I can’t wait to see what’s next.
P.S. My hubby and I literally LOL’d at the Bane reference. ;)
Petite Modern Life says
hahaha, I was LOL’n it up while I was wearing it ;) You’re so sweet, thank you for the encouragement!
Elke Clark says
We redid our outdated bathroom in white tiles, biggest mistake ever. Impossible to keep clean, everything shows up. Hope you like yours, wish I’d have done ours in a more neutral color.
Petite Modern Life says
That was definitely a thought I had Elke! We’ll see how it goes! I’m hoping the texture of paint is easier to wash than standard grout and tile, but only time will tell. I’ll update in the future how it’s going. But good point!
Bre @ Average But Inspired says
LOVE!!! I need to do my kids’ harvest gold bathroom. So glad you had an awesome experience with this product. And thanks for the tip on the respirator. :-)
Petite Modern Life says
I’m so glad this post helped and I can’t wait to see your bathroom before & after!
Anna @Annabode says
This is insane! We’re looking to buy a midcentury home this spring and I’ve been dreading having to do the bathrooms, but knowing this product is out there is a game-changer. Thank you so much for sharing the tutorial! Definitely pinning for later!
Petite Modern Life says
It’s really an amazing product. I was able to do the whole thing myself (which usually isn’t so with house projects.) I love that bathroom now!
Aimee, The Crazy Craft Lady says
This. Looks. Ah-Ma-Zing! I had to laugh about ordering off Amazon… My heart sinks a bit whenever I find something I want, but it doesn’t come with Prime shipping. They have gotten me so spoiled!
Yasmina @ Mina and Her Blog says
Oh wow this looks so good! We are thinking to paint our tiles too! Great tip of wearing mask haha love the picture!
Petite Modern Life says
Thanks Mina! It’s a pretty awesome simple transformation (though stinky!)
Petite Modern Life says
Haha!
Trude says
It looks amazing, thanks for sharing all the steps! And I am so with you on shower curtains v. glass. Where I’m renting now has glass and I HATE having to clean it and see the water marks every day (so I wind up spraying a 20% vinegar solution once a week and calling it good). Love the light you chose too!
Petite Modern Life says
I hear you! Whereas some glass is just gorgeous on a fancy remodeled bath, my DIY guest bath did not need that type of maintenance. Way to find a renter solution! And thank you sweetly for your compliments :))
janet says
Now that it’s been about a year, how is it all holding up? You did the interior of the tub, too, right?? My bath isn’t soooo bad, but it’s really old and could use a new coat. re: things showing up against white, I use bleach/water mix in a spray bottle and give it a shot every now and then – works well for me – on the white shower curtain too. washing in the machine with bleach doesn’t do as well. of course, i try not to do it too often.
Petite Modern Life says
Hello Janet! I wish I could honestly answer on how it is all holding up, but we actually sold the house in July and never used the guest shower while we lived there! A bit of a failed experiment right? I know there are others who have used the kit and you could google it or look up the reviews on Amazon :) I hope that helps somewhat!
Gaby says
Hello, did you use painters tape at all for the edges? If so, from your experience should one remove the tape asap? If the paint dries super fast and gets hard, I’m afraid it would be difficult afterwards to remove any tape that had contact with the paint. Any advice on how to paint around the edges would be super helpful ?
Petite Modern Life says
Hi Gaby! Yes, I would remove the painters tape early after application. Thinking back, I didn’t use tape around the shower because my walls were white and we were replacing the floors with tile. I was careful near my black wall, but just touched up the edges with leftover black paint when all the tile painting was done.
Lisa says
I’m interested in doing this with my 1981 tiled baths and kitchen. Can you tell me how it’s holding up so far?
Thanks!
Petite Modern Life says
Hi Lisa!
I wish I could say we got to test them out to the max, but we sold the house not long after the project, and being the guest bath, we didn’t use it! Check out this post on The Heathered Nest for her updates on a similar project! http://heatherednest.com/2015/05/bano-para-los-ninos-dia-de-la-revelacion.html
Kathleen says
You said you removed the grout but never talked about going back and regrouting. When in the process did you do this?
Petite Modern Life says
Hi Kathleen! Good question. What I meant was that I cleaned up the grout that had gotten on the tiles (ours were super messy!) I left the grout in between the tiles and just painted over them. Is that what you meant?
Micki says
This was several years ago, how has it held up? Any regrets?
Petite Modern Life says
Hi Micki! Unfortunately, we sold that house after only a year of living in it! My friend Heather did it in her bathroom too and has shared how its holding up in her blog here: https://heatherednest.com/bathroom-tile-paint-3-years-later/ I hope that helps!