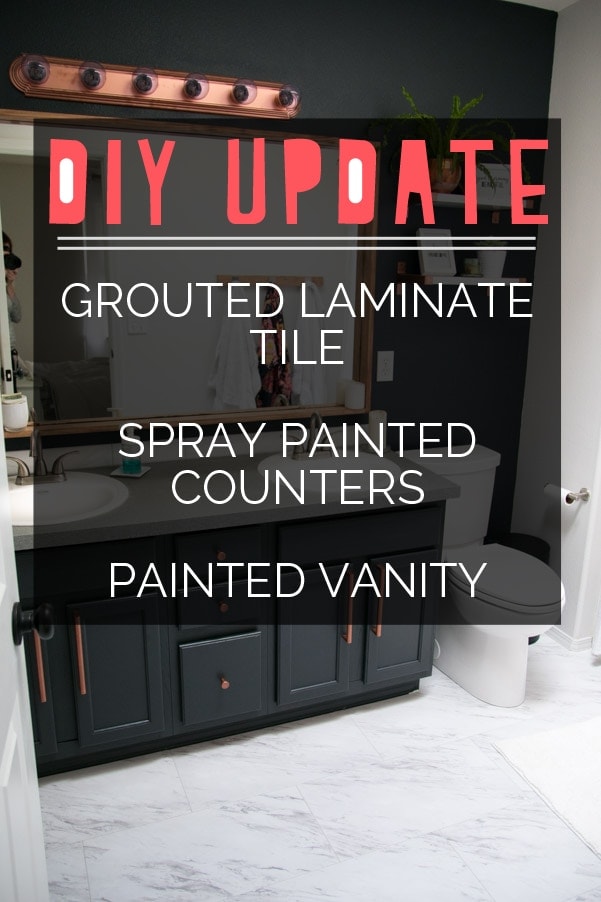
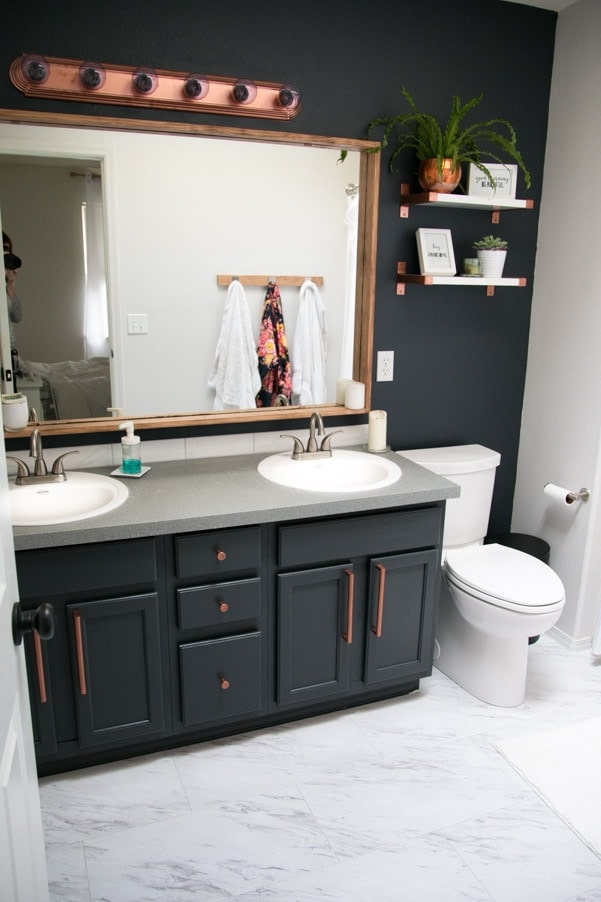
It has been almost 3 months since we wrapped up our Master Bathroom Makeover so I figure it’s time for an update on how our DIYs are holding up!
If you remember, we did 4 major DIY projects to complete the space.
- Grouted laminate floors.
- Spray painted over existing laminate countertops.
- Painted over the oak vanity and hardware.
- Built a wood frame and hung it around the existing mirror.
Now then, let’s talk honestly about how these DIYs are all holding up.
How the grouted laminate floors are holding up
I will now have to admit that for the first time in three months I actually mopped the bathroom floors. And WOW, who’d have thought that that actually makes a difference! ;) I was nervous, because I started seeing brown across the tiles, but a solid mop job with this mop and this cleaner got everything right up.
The only things that I’ve still noticed, though my husband says he can’t, are what I believe to be residual lines/discoloring from using the grout sponge. With the tiles having gray “veins” and coloring along with white, it’s really well camouflaged, but I tried to take some pictures of what I mean.
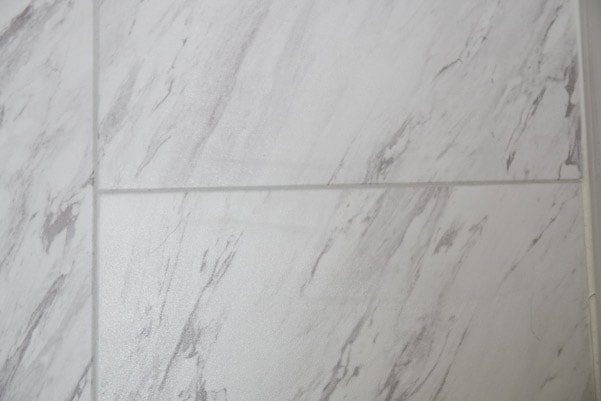
The lines you see going “against the grain” are what I’m referring too. Entirely unnoticeable to anyone touring the bathroom, but I can tell. I’ve tried using a magic eraser to get it up, but it didn’t work. There’s a chance it wasn’t the grout and is just the tile, I’m not a hundred percent sure.
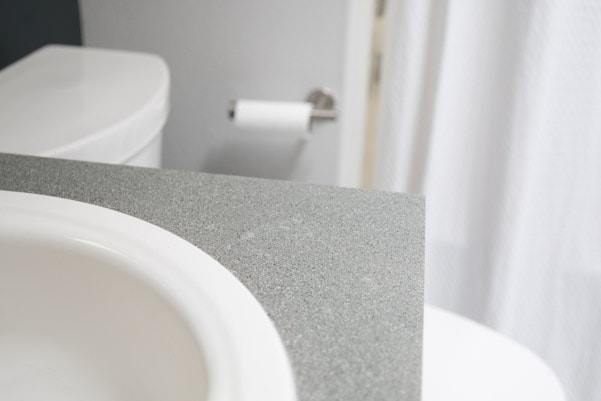
How the Spray Painted Counters are Holding Up
This was perhaps the iffiest project of the four. The texture spray paint was bizarre to use (read more here). And once I pulled off the tape that was protecting the edge of the sinks, I was left with difficult gaps that I couldn’t touch up easily. What I ended up doing was trying gray caulk (I hate caulking…) and also using a gray and black sharpie to fill in the spaces. That part doesn’t look horrible and it has held up.
Nothing has chipped, which surprises me. Even on the edges.
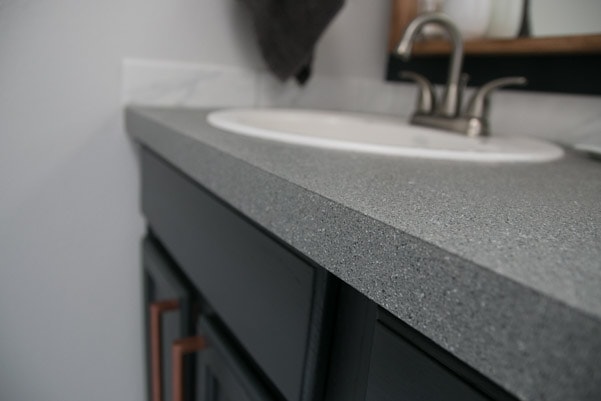
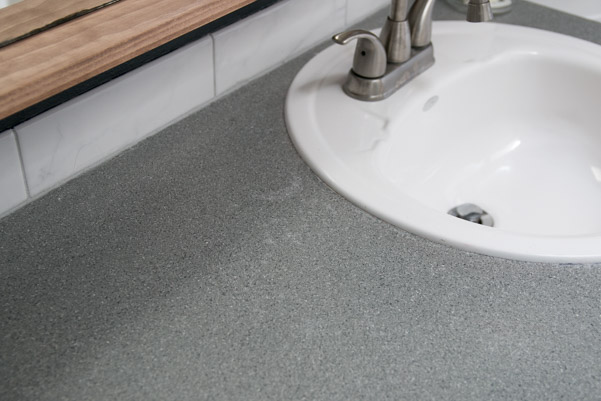
What has occurred, despite my attempt to seal it well with a few layers of sealant, are water marks that haven’t disappeared. Not all water leaves a mark, so I’m not sure why these ones are particularly different. I haven’t used chemicals on the counters for cleaning, but maybe some water has stood longer than other times.
The question is touch up. Will I be able to spray enough texture paint into a cup to use with a paint brush? Or do I leave it until we chose to do something else? Do you have any suggestions? Let me know below!
How the Painted Vanity and Hardware is Holding Up
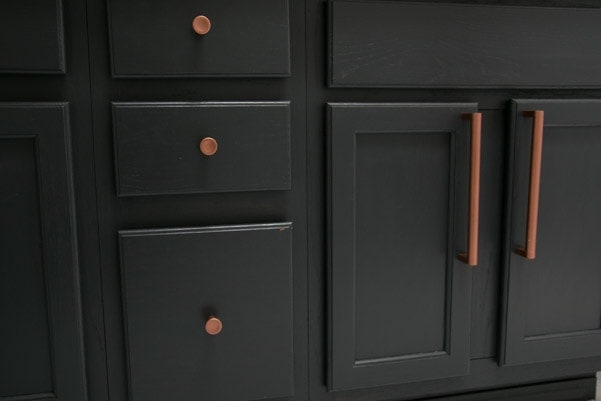
Good good and good. I didn’t expect to have any issues here as we’ve done it before, but there’s always a chance! The spray painted hardware’s most precarious life stage is in between painting and putting them on! If you bump the handles together or against another type of metal, they will scratch and you will curse. But once they’re on, no problem!
How the Mirror Frame is Holding Up
We LOVE this mirror frame and the 30 minutes it took to put it together. We’ve fooled people into thinking we’ve purchased an entirely different mirror, when it was just a couple 2×4’s nailed together and stained. Don’t hesitate to tackle this project yourself!
I hope that helps you in your quest for some sweat home equity! These inexpensive projects go a long way in the realm of aesthetics. But it’s good to know what will last and what will bother you ;) Cheers!


Lindsay Suto says
So our new house is great, except…it has those horribly dated brassy gold hardware EVERYWHERE. I cannot stand it and my plan from the minute we saw the house was to spray paint it. Now that we are in husband is having second thoughts about that working and wants to buy new everything to replace it ($$$). I’m doing a test run on the door handle to our linen closet (baby steps) but I was wondering if you have any tips. I see you painted your hardware but I couldn’t find a tutorial or anything. Also I REALLY want to frame our mirror but wondering how you would go about attaching since there isn’t really free wall space next to the mirror (it goes all the way to the wall and the has a horrible gold piece that it sits in on top of the vanity backsplash). You know my DIY skills are total newb level so I need all the help you can give me!! Looooove all of your bathroom remodels. ??
Petite Modern Life says
Hey Linds! When we bought this house the shiny brass hardware (door knobs, hinges, and door stops) were the first things to be replaced. We just took them all out and replaced them with cheapest black door knobs/hinges at Lowes. Though, “cheap” unfortunately doesn’t seem that “cheap.” We’re really glad we did it though as it was a huge and fast improvement on the whole house. Spray painting metal can be such a drag with off results, it really really wasn’t worth it to me to do that for all those pieces! The longevity of switching out the entire hardware set for new hardware is worth the bucks. If you want, you can focus on one floor or just the outer room doors, then another months budget do the closets and bathrooms.
As for our mirror frame, we purchased a long pine board (or two) that was about 3″ wide, nail gunned them together in a square that measured the dimensions on our mirror and it fit firmly around the glass. We honestly haven’t attached it to the wall behind the mirror! Whoops. It hasn’t budged, but we would have just shot a nail diagonally through the back top part of the wood and into the wall to secure it. (If you can’t tell, we’re huge fans of nail guns.)