Welcome back to my Intro to Starting a Blog series. Previously we’ve discussed Why to Start a Blog and the difference between a self hosted and a free hosted blog. Now that you know where to begin, let’s talk about how to design your blog.
How to Pick a Theme
Once you have your web host (Refer to the previous post, I suggest SiteGround.com) and get on the WordPress platform, you will need to select a theme. You don’t have to use the WordPress data base to select your theme, there are plenty of other places to shop for themes. In fact, there are SO many places to choose themes from online that it can be quite overwhelming to know where to begin. To help you limit your search I suggest looking at Creativemarket.com and Etsy.
In creative market go to the menu and select Themes –> WordPress –> Blog and start searching. In Etsy, search for “WordPress Themes.” You’ll see that there is quite a variety of themes and prices for the themes. Many start at just $10! It is possible to switch themes whenever you want when blogging, so don’t think this is a forever decision. Now you can install the theme on your own, or have the designer load it for you (sometimes free, sometimes extra $) and follow the FAQ from your theme’s designer to customize it like their demo/the way you want. Many designers will work with you to create a customized design/function with your theme for a nominal fee.
Note: Make sure your theme is “Responsive.” Meaning it will adapt to any device it is being viewed on (computer, phone, tablet, etc.)
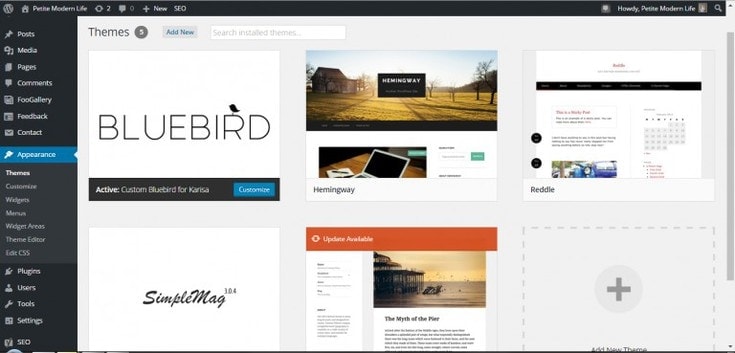
You’ll be able to see all your uploaded themes in your admin page. My current theme is the Bluebird Theme by MaiLoveParis. Mai is fantastic to work with! My previous theme was the SimpleMag Theme from Theme Forest. I loved the many ways you could easily change up the look of this theme with simple clicks and following the many tutorials they had provided.
How to Quickly Customize Your Theme
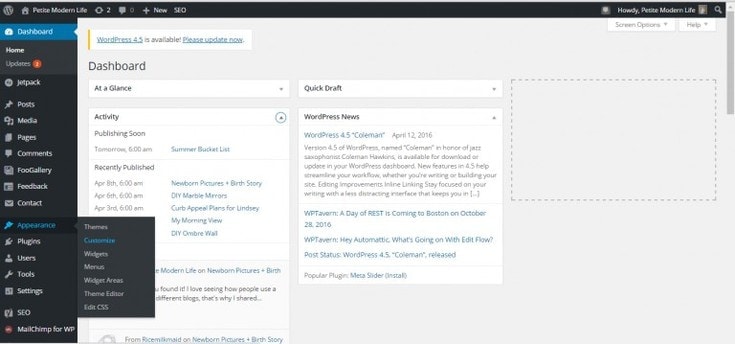
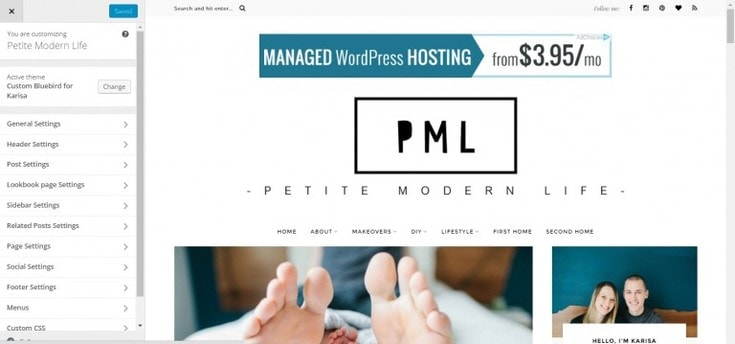
Your theme will come with customizable options to make it look like the demo themes the designer displays on their site. This is where you will upload your logo, select the colors for your texts, choose your menu locations, etc. To access this go to your admin navigation bar –>”Appearance” –> Customize.
How to Set Up Your Main Menu with Categories
Now you need to get your menu bar set up so when you write your blog posts, they will be organized from the beginning.
- On the admin navigation bar, select Posts –> Categories
- Create the categories you’d like to organize your posts under.
- To create subcategories, select the dropdown menu under “Parent” and choose the parent category for your subcategory.
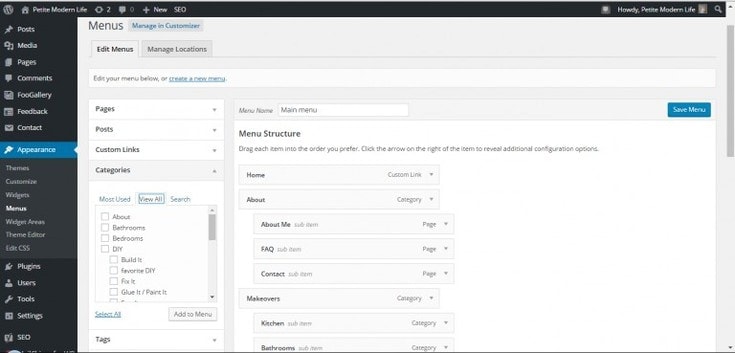
- On the sidebar now select Appearance –> Menus
- Select the dropdown menu “Categories” and select “View All.”
- Check the categories you wish to have in your main menu and click “Add to Menu.”
- Be sure to click “Save Menu” before navigating away from this page.
How to Set Up Your Main Menu with Pages
If you want a landing page that isn’t a post, like an “About Me” or “Contact” page, then follow these steps below.
- On the admin navigation bar select Pages –> Add New
- Create your page and click “Publish”
- On the sidebar select Appearances –> Menus
- Select the dropdown menu “Pages” and select “View All.”
- Check the pages you want to add to your main menu and click “Add to Menu”
- You can nest your pages under a category or have them on their own.
How to Add Widgets to Your Blog
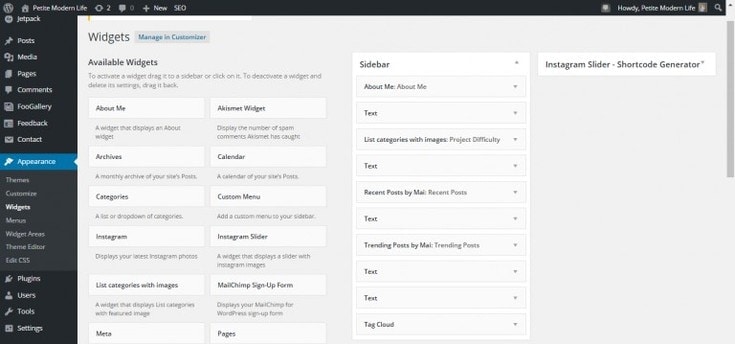
A “widget” is a small block in your blog’s sidebar that performs a specific function. To add a widge go to Appearance –> Widgets. Drag a widget from the list into your sidebar then click on and edit the widget. Visit your site to see what the widget looks like.
How to Add Plugins to Your Blog
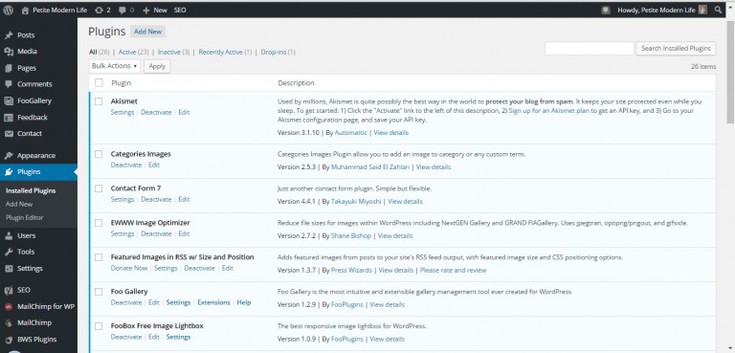
Some widgets come from plugins. A plugin is “a program, or a set of one or more functions, written in the PHP scripting language, that adds a specific set of features or services to the WordPress weblog.” {wordpress.org} You can access your Plugins in the left sidebar of your admin page.
Some themes have recommended/needed plugins to download from the get-go. So you’ll need to go here and select “Add New” and search for these required plugins. That is also where you can search for fun/useful plugins.
Note: Too many plugins can harm your website by conflicting with one another. If you find you are not using a plugin it is best to deactivate it or delete it.
Some useful plugins are:
Yoast SEO
Regenerate Thumbnails
EWWW Image Optimizer
Contact Form 7
JQuery Pin it Button for Images
Google Adsense by BestWebSoft
Akismet
Foo Media Gallery + Foo Media Lightbox
WP Gallery Custom Links
Header and Footer by Stephano Lissa
When you upload these plugins to your website and activate them you will most likely locate their options in your admin navigation bar under “Tools” or “Settings” or not nested under anything.
That’s it for today! Next time we’ll discuss how to set up a beautiful blog post!
 Please send me an email using my contact page for my rates and options!
The Full Series
- Why start a blog.
- Free Hosted vs. Self Hosted.
- Step by step how to set up and organize your blog’s theme.
- How to write and design a good looking blog post.
- Eight down to earth ways to grow your blog and a crash course in Google Analytics.
- Two easy ways to make money blogging.





Leave a Reply