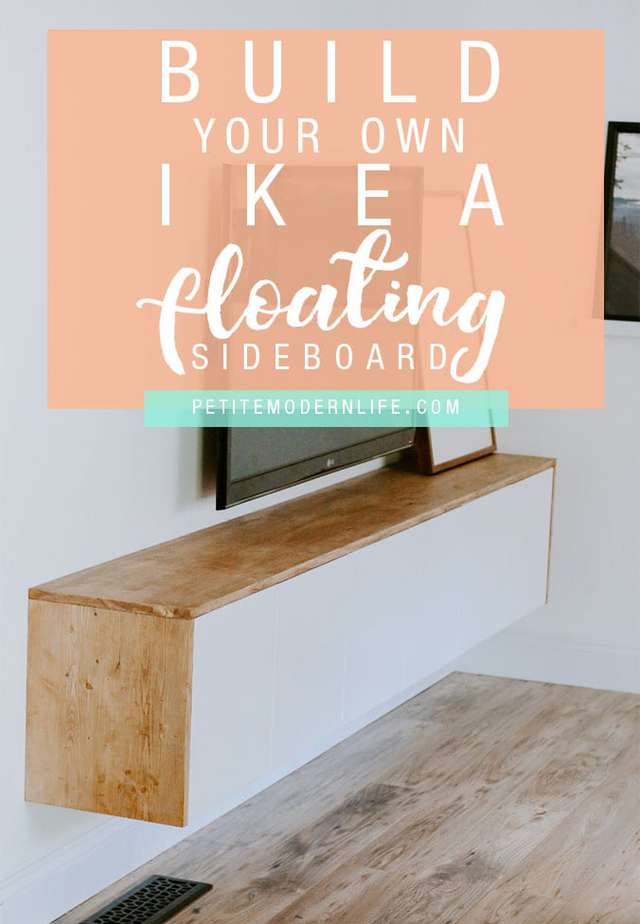
A few years ago we designed the most gorgeous DIY Ikea floating sideboard as part of our Scandi Living Room Reveal! It was one of the highlight pieces of our rambler remodel along side the DIY faux concrete waterfall island! and the industrial modern bathroom makeover.
If you been around Petite Modern Life you’ll recognize this beautiful floating entertainment center as the one from our first home remodel. It was on of the first building projects we did after the kitchen remodel. And I would do a again, and again, and again!
I’m not exaggerating! Every house or space we’ve lived in since, we’ve always wanted to make another floating sideboard TV stand. Why? Let me tell you!
5 Reasons we love floating TV stands:
- They add so much visual space to a living room. Being able to see the entire floor below your entertainment center is like a breath of fresh air. No dust bunnies camping out and building up their forces, no rogue toys impossible to reach, just air and light!
- Cables, DVD players, gaming systems, DVDs, sound system consuls, and other TV items stay out of sight out of mind.
- You can mount a floating sideboard exactly where you need, anywhere you need it. Yay suspension rails!!!
- You can customize a floating TV stand to fit ANY type of home decor. Keep reading to find out how!
- It’s more than some storage furniture, it’s a statement piece!
SIMPLE materials for building a floating sideboard:
– 3 double Sektion Ikea wall top cabinet frames. There are options for different lengths and depths. Be sure to measure your TV DVD, gaming, and sound systems to know what size you’ll need!
– 6 Ikea wall top cabinet doors. We chose the middle grade white door option for $20.
– Wood top piece. This you can purchase in the Ikea wood countertop section OR purchase the appropriate length wood at your local hardware store!
– Recessed wall cable management boxes
– TV mount
**Note: for our sideboard we used cabinets that were 30″ long, 12″ deep, and 15″ tall. They changed there cabinet selection right after we purchased, so you might have slightly different dimensions.
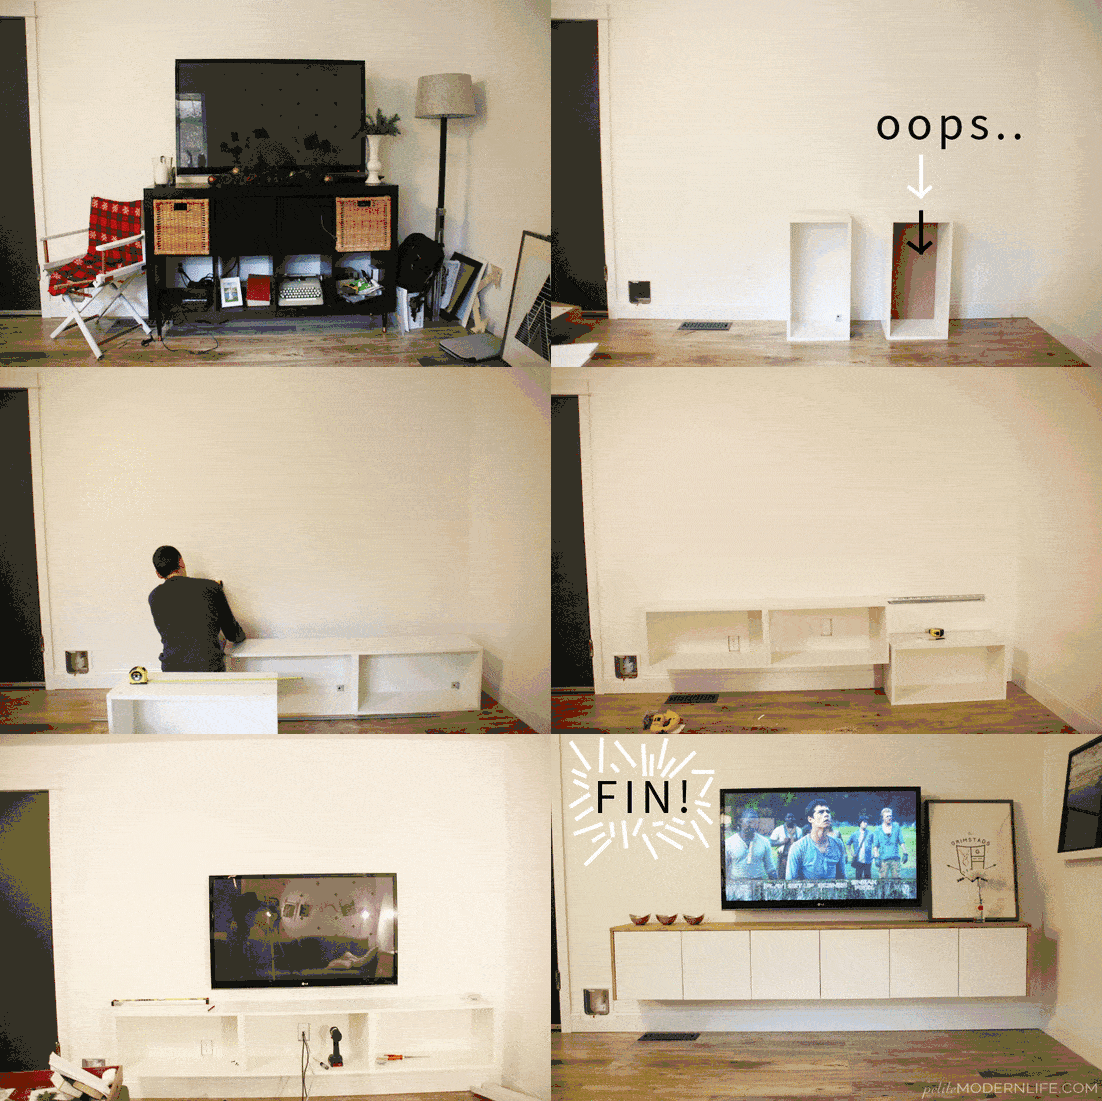
I love this GIF of some of the sideboard process! Let’s break it down below.
How to build an Ikea floating sideboard
1. Assemble the cabinets. Easiest part right? I, of course, couldn’t execute an Ikea project without putting something on backwards, and the cabinet back was the winner this round!

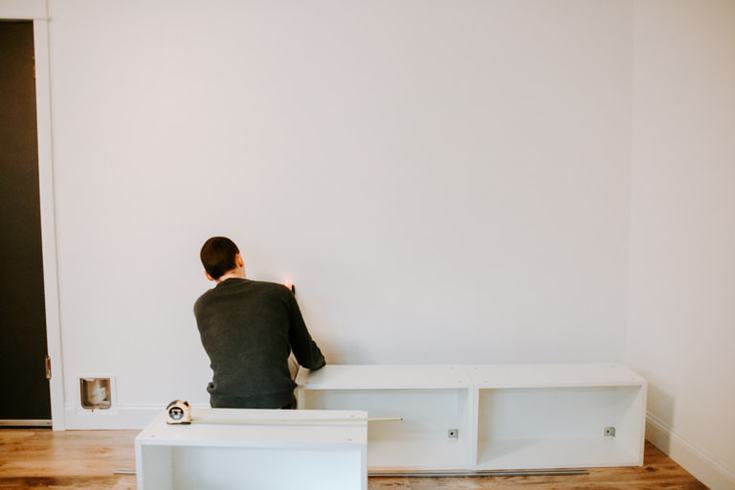
2. Decide where your TV needs to be positioned for optimum viewing comfort. From there, decide how high your sideboard should be mounted. Our cabinets are about 10″ from the ground.
3. Attach the suspension rail(s) to the studs. Be aware of your electrical wiring locations in the wall before drilling. We cut one of the two suspension rails to fit across all our shelves.

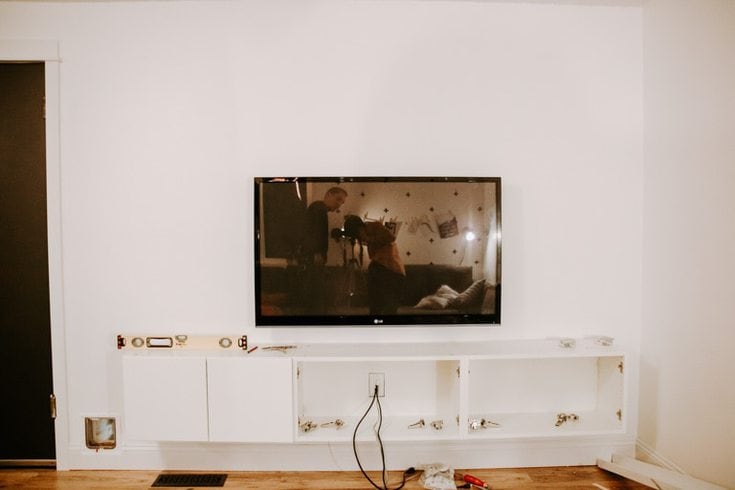
4. Mount and screw in the cabinets, checking they are level as you go.


5. Secure your TV mount (this Amazon swivel one has 26,000 positive reviews ) so you can determine where your TV cords need to run through.

6. Cut the appropriate sized hole in your wall for using recessed wall cable management boxes. You’ll need one next to the TV and one inside of the floating cabinet.

7. Run the necessary cables from your DVD player or sound system up through the cable managers towards the TV.

8. If you need more space for the various TV systems (sound system, gaming system, dvd player, etc.) drill a hole t0 connect two cabinet spaces to pull the additional cords through to your hookup.

9. Mount your TV and connect the cables.

10. Attach the cabinet doors.
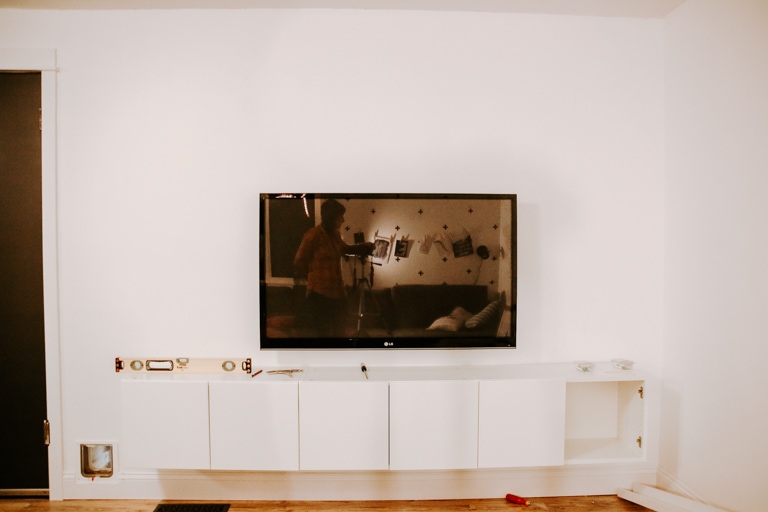
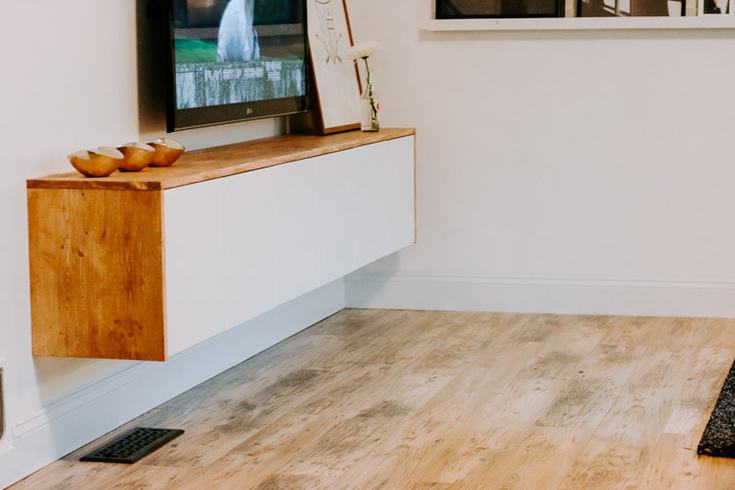
11. Using a nail gun, attach the pre-stained board to the top of the cabinets and then the sides. We used a pine board we found at Lowes. We chose to let the top overhand and the side be nailed in underneath.


That’s it! You’ve just made your own DIY Ikea floating sideboard that will wow your guests, keep you organized, and enjoying your television at the exact level you love.


It feels SO good to have those cables out of sight! You’ll pat yourself on the back over and over again I promise!


So crisp and so clean!
How to customize your Ikea floating TV stand to fit your exact home style.
So maybe you like the idea, but are not thrilled about our minimal, white, and modern farmhouse style floating sideboard. That’s ok! Follow these tips for customizing your floating sideboard to get the exact match for your home style.

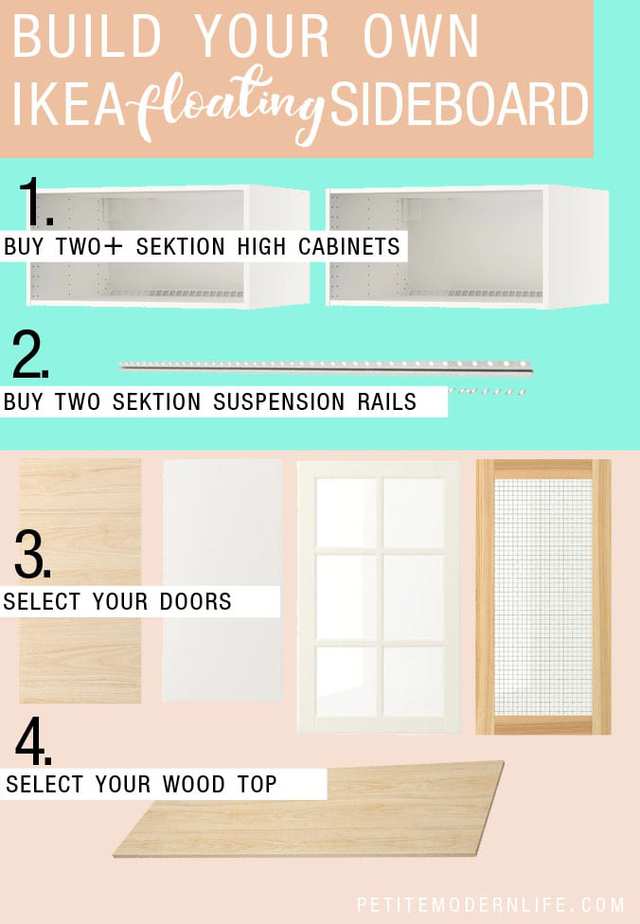
1. Paint your cabinets.
I’m all about customizing Ikea furniture by painting. In my post about Building Your Own Ikea Desk, I share how you can easily paint the flat surface.
All you need is a high density foam paintbrush roller and a few layers of paint. Paint it darker or a pop of color that matches your living room mood!
2. Choose a unique cabinet door.
Ikea sells a variety of cabinet doors that will transform your floating TV stand. Look at those or make your own! For a more rustic chic look you could use chicken wire fronts. For a shabby chic look use farmhouse style pained glass cabinet fronts. For a Scandinavian modern TV stand combine the raw wood and white cabinets together.
3. Stain or paint the wood cabinet top.
We tend to go for dark walnut stain for a LOT of our projects, but there are SO many stains to choose from. Choose a brown gray for a shabby chic style. Choose a rich brown for a more traditional home. Paint it navy for a masculine look. Paint it blush for a feminine pop!
4. Decorate the shelf, don’t clutter it.
Use this TV stand as a decorative piece on top, storage on the bottom. Aka, hide the junk behind the doors and utilize that empty top as a shelf to display your home style. Add picture frames, plants, or small wire baskets as little catch-all’s. Challenge yourself to keep the top clear of clutter and you’ll love how it adds to your home decor variety while still being utilitarian!
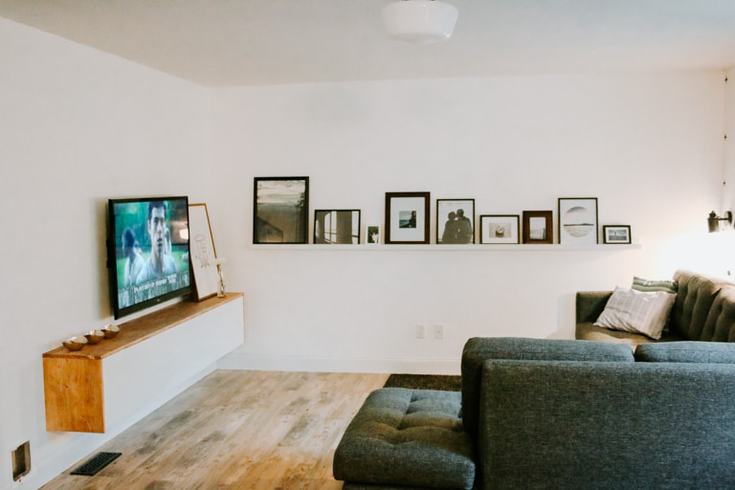
What else you can use a DIY Ikea floating sideboard for.
This sideboard doesn’t just have to be used as a TV stand, it can be used as:
- A wet bar in the dining room.
- A floating vanity in the bedroom.
- Entryway storage floating shelf.
- Kids playroom storage with storage space below too!
- Floating nightstands.
- Laundry room storage (down low or up high!)
I love that all these piece can be purchased individually and at different prices that will fit your room decorating and budget needs!
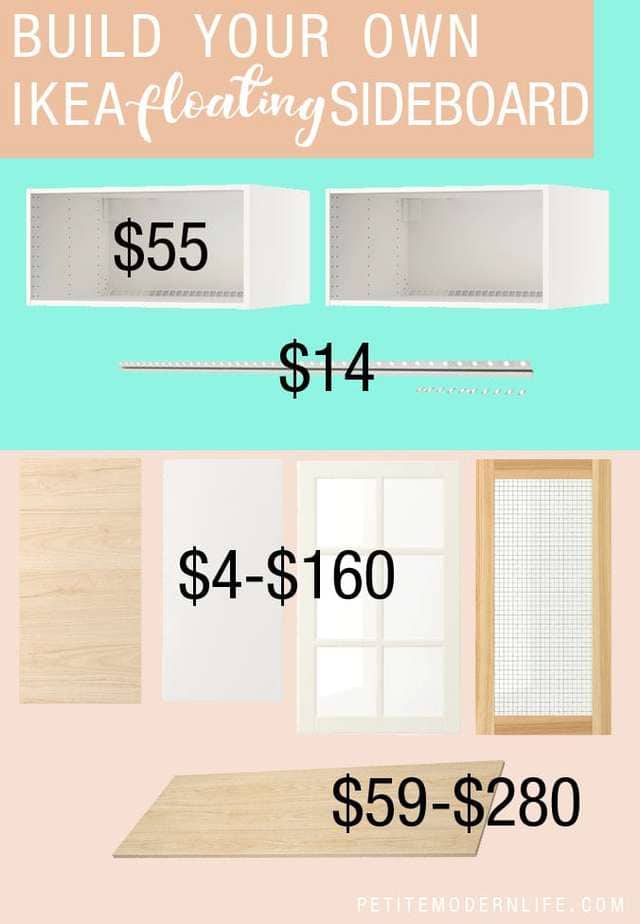
The cabinets themselves come in different lengths and widths so you can do this project regardless how much space you have!
With a floating cabinet you’ll have more storage, hidden storage, hidden cables, decorating and visual space in whatever room you have to work with.


*Click the images below to see the full living room reveal and other living room projects!**



Corinna - For My Love Of says
Wow! Just wow! It’s stunning and perfect for your space!
Petite Modern Life says
Thank you :)
torm3nt says
Great idea! Q: does the remote frequency go through the doors? Or do you have to open them to work the dvd or cable box? Thx.
Petite Modern Life says
The PS3 would go through the doors yes. We did leave them open while running the PS3 because it would get too hot inside!
Kyla @HouseOfHipsters says
This is awesome! Totally modern and clean.
Petite Modern Life says
Thank you Kyla!
Breanna says
Seriously amazing! And I’m in love with your floors too :)
Carrie @ Kenarry: Ideas for the Home says
Wow, Karisa! This floating entertainment center is incredible. I love the simple lines of the design. It look so cool in your living room.
Petite Modern Life says
Thank you Carrie :) It’s just what we needed!
Jesica says
This looks so fabulous! We just installed a floating Besta under our TV to use as a media cabinet but I haven’t wrapped it in wood yet… I kept feeling intimidated by adding extra weight to the cabinet for some reason. I love the way the pine board turned out!
Petite Modern Life says
Thank you Jesica! It’s such a great storage solution isn’t it? Can’t wait to see more of your projects on your blog!
carissamiss says
I’m a sucker for ikea hacks! Love this! You are being featured at Outside [the Box]!
Petite Modern Life says
Thank you! Totally honored!
Krystal says
I have been wanting to do something like this for so long. It looks great! My question is ( and why I am taking so long to do mine ) regarding the cable boxes, PS4, etc. I hate seeing them out in the open on such a nice sideboard. I noticed you had yours inside the cabinet. How does the reception work? Do you have to keep the doors open when you watch tv?
Petite Modern Life says
Hi Krystal! We have all the TV consoles inside yes. The PS3 totally works doors closed. I assume the Wii does too, but you’d have to set the wand up while playing. The only qualm is that the PS3 gets way too hot if the doors are closed while it’s working hard for an hour. So we leave one door open while watching a movie or gaming. We could also cut a vent below it to help it cool down door closed! Hope that helps. It’s a perfect solution to hiding cables and consoles!
Krystal says
Good to hear the reception works with the doors closed. A hole in the back might be an option for cooling. Thanks for the info! Fingers crossed it works on my cable box too :)
the cape on the corner says
yes to this. enjoy! we finally put the mcm dresser i got at a thrift store to its intended use as a tv stand, so i am with you on the new and improved.
b
Petite Modern Life says
Thank you! It’s so nice to feel form + function with “the right piece”!
Jenna @ A Savory Feast says
This turned out great! I absolutely love how it looks in your house. Thanks for sharing the tutorial with Hump Day Happenings.
Elizabeth Midgett says
This is awesome. I’m totally doing this in our media room.. But listen to this, I just went to Ikea to get the Sektion over the fridge cabinets and they now start at $147!! When you made your shopping list, they were $71? That’s crazy! Thanks for all the detailed pics and instructions.
Petite Modern Life says
Elizabeth! I know :(( I was so bummed when I tried to link to the products I used and saw they were discontinued 2 weeks after I bought them!! (If I’d known I would’ve bought a ton!) I hope you can find a replacement one because it’s such a great piece! I’ll be taking mine with me when I move someday (sorry new owners…)
MaryAnn says
I love your new space. It is refreshing; provides storage; reduces clutter; gives more space and it looks absolutely cute.
Anonymous says
Did you consider or find any cabinets that would work with recessed doors? Doors that slide back into the unit instead of opening out into the room?
Petite Modern Life says
We didn’t look into that, but I do believe Ikea would have options in different models of their cabinets to do something along those lines! You’d just need to purchase their mounting rail system to have it float on the wall.
Anna says
I seriously like this! May I ask, how are you hiding the cords from the tv down to the DVD player / cable box??
Petite Modern Life says
Hi Anna! The cables are pulled through the wall through a simple outlet box down into the TV stand.
Sarah Connelly says
This is great! Just what we are after. Thanks for the post.
Petite Modern Life says
Glad I could help!
Chris says
How do the doors open at the far sides? Is there room for them to fully open or are they stuck because of the laminate panel?
Petite Modern Life says
Yes all the doors are fully able to open as shown in the pictures!
Chris says
Do the doors open on the ends where the laminate butts up against the doors?
Petite Modern Life says
Yes all the doors are fully able to open as shown in the pictures!
Beth says
Looks good but wouldn’t you have to leave the doors open to change channels?
Petite Modern Life says
We never had an issue with the signal passing through the closed doors actually!
Robin says
Hi Karisa, can you tell me specifically which Besta cabinet you would recommend as there are many different styles and sizes. thanks! Love your idea.
KW says
This looks great! We’re working on this project right now too. I know you posted this a while ago, but can you tell me what you used to cut the suspension rail? We have to do the same. Thanks!
Petite Modern Life says
Hi Kay! My husband did it with a hacksaw (a small handheld saw meant for metal!)
Natasha says
Hi there, I’ve been dying to put a tv shelf like this together and the Besta was finally back in stock. Yay! We’ve assembled the pieces but aren’t entirely certain what screws to use to mount the piece? We bought the tv unit version, which is not compatible with the suspension rails. It’s meant to just be screwed directly into the wall. We’re a bit intimidated and want to make sure we have the best more durable screws.
Thanks!
Natasha