Hey there! I promised a tutorial/tips and tricks for making your own DIY Balloon Arch, and here it is! 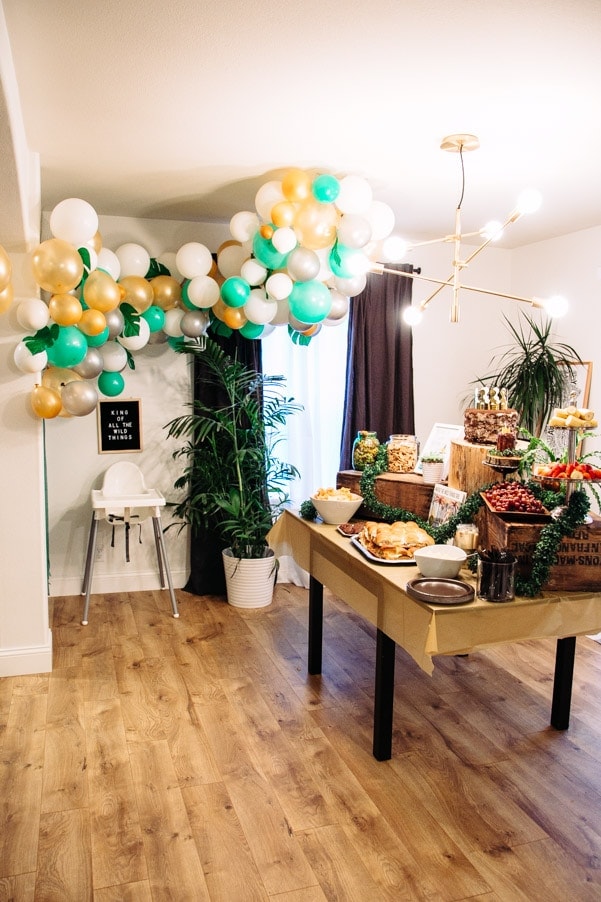
I fell in love with DIY Balloon Arches through The House That Lar’s Built Instagram account. Brittany is a creative genius that oozes out beautiful and amazing projects every season. Apparently, her Balloon Arch tutorial is one of the most popular posts on her site.
It’s not hard to see why.

The DIY Balloon Arch that made me think “That’s totally my Wild Things vision” was this one from @minimalaffair
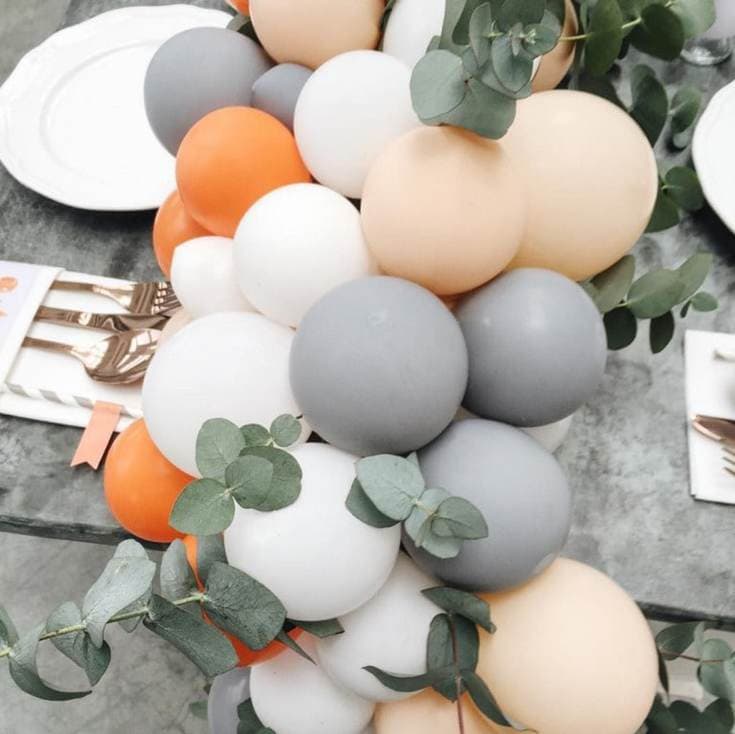
I loved loved the muted colors with the blended pop of orange and simple greenery.
But I also really liked the balloon arches that incorporated different sizes of balloons to create layers and dimension. I watched The House That Lars Built video tutorial to get a feel for what I was going to be doing then I made my list of materials and supplies.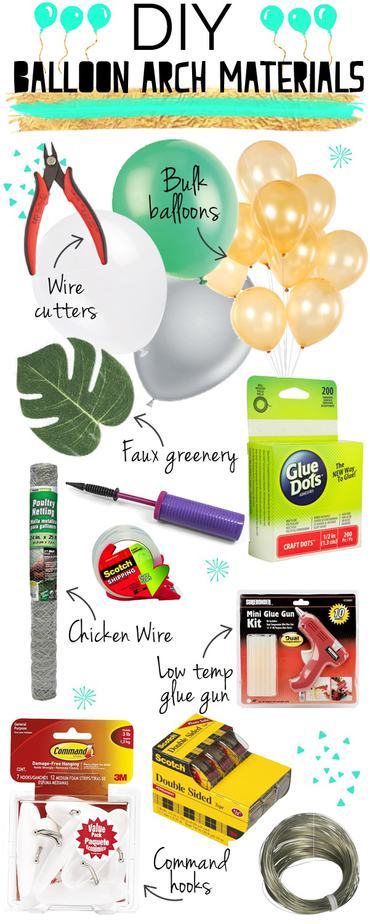
Wire Cutters / Green Balloons + White Balloons / Gold Balloons / Faux Greenery
Balloon Pump / Glue Dots / Clear Packing Tape / Chicken Wire
Low Temp Glue Gun / Command Hooks / Double Sided Tape / Wire
I WISH I had bought all these materials off of Amazon. Seriously they have the best price for everything over Home Depot and the craft store.
As I was creating my DIY Balloon Arch I realized I needed MORE supplies than the tutorial I had watched suggested. If I would have had all these supplies from the get go it would have saved me just a few extra headaches. ;-)
Here are my Tips + Tricks for a DIY Balloon Arch
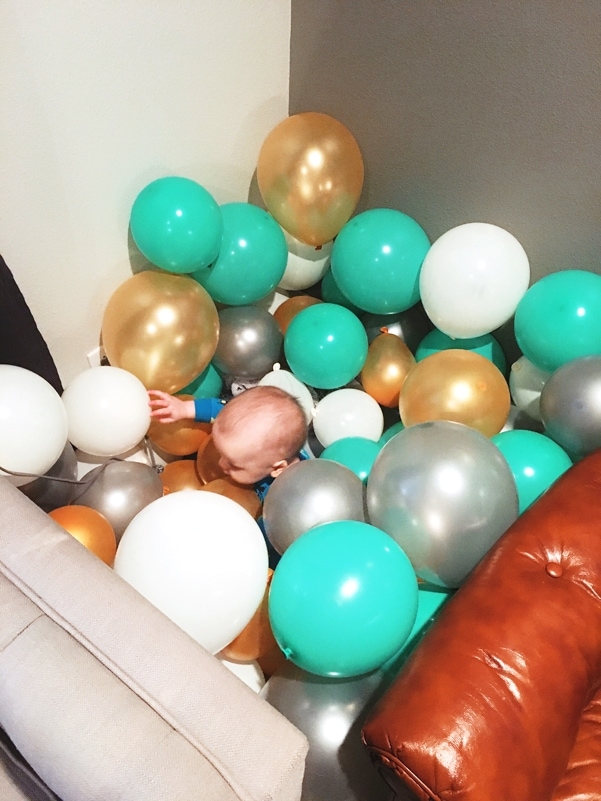
- Blow up a TON of balloons in advance. Like while the baby is napping or while you’re watching a show. For my little balloon arch I probably blew up between 150 and 200 balloons of all different sizes. Yah. That’s why you’ll be wanting a balloon pump and probably some chiropractic care for your sore tying fingers. Here’s my kiddo playing in some of my penned up balloons! (Also consider where you’ll be storing this chaos…)
- Mount your chicken wire: If necessary, cut your chicken wire in half with wire cutters. I purchased mine at Home Depot and it was wider than I needed, but not long enough. So I cut it in half (wear heavy gloves during this, I “toughed it out” but that chicken wire is a B****…) I used THREE methods to secure my chicken wire after it crashed on one side using the command hooks like some terrible booby trap. I nailed one end into the wall stud. I wired two ends to my curtain rod. And I used 2 command hooks to hook it to the ceiling. This seemed to do the trick.

- Tape over the sharp edges with clear packing tape. This will protect your balloons and you!
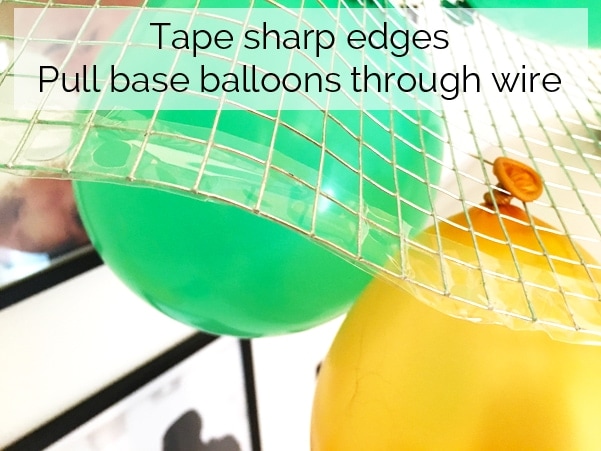
- Attach your base balloons. My chicken wire had small enough hole that I could actually just pull the end through and that was that! My base balloons were the biggest blown balloons so I could start covering ground quickly. Pull the balloons through the top and the bottom.
- Attach your balloon layers. Here is where I had to really branch out from the above video tutorial. For whatever reason, sometimes the low temp glue gun would cause balloons to pop in my hands. (**Be sure to keep your glue gun upright while its on. This might’ve helped me in retrospect!) Sometime the glue dots would NOT adhere the balloons for me so I would use double stick tape instead or rolled packing tape. *major eye roll.* I tell ya, my heart and nerves were pounding from sheer random balloon popping terror and frustration during this process. But by having all those supplies at the ready, I was able to create layers that hid the chicken wire.
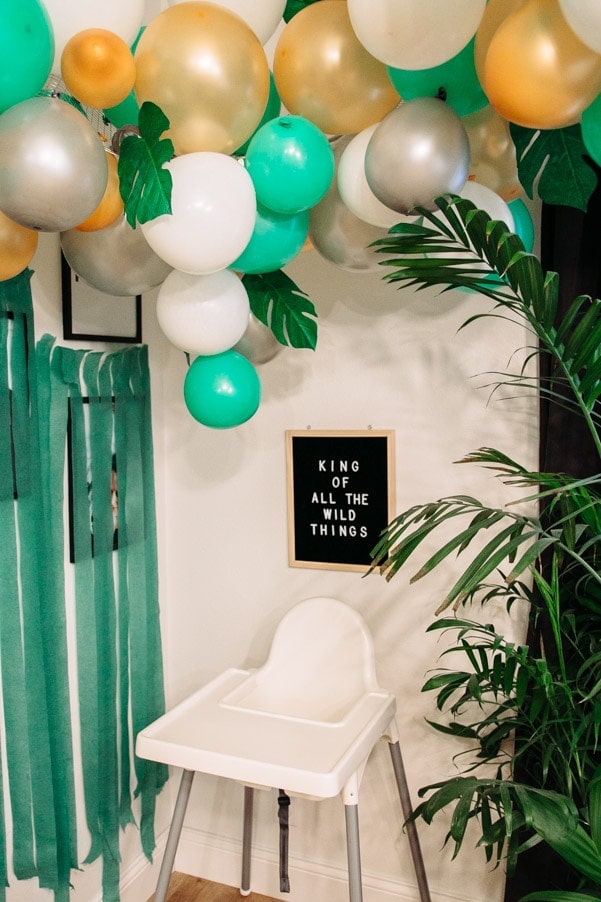
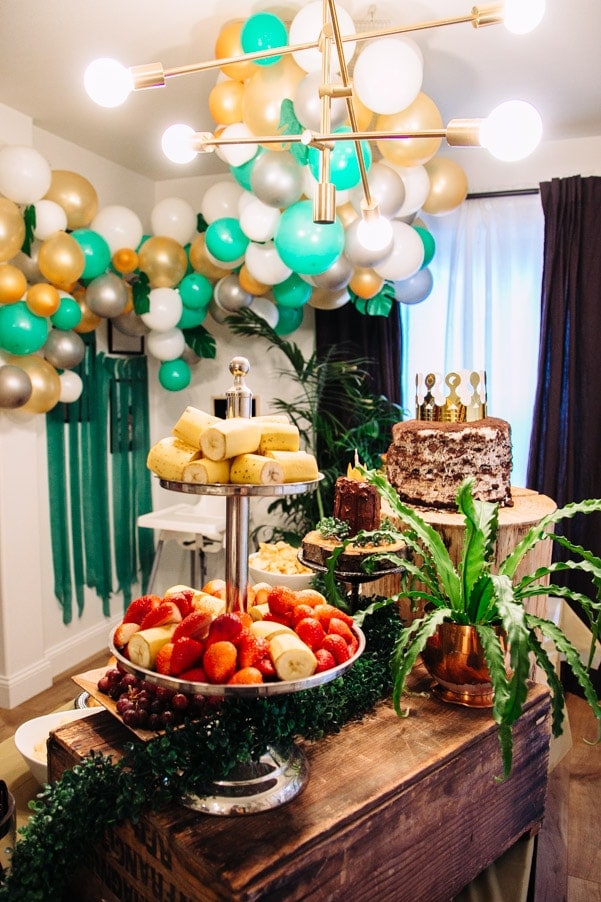
- Add greenery. This is the fun part.
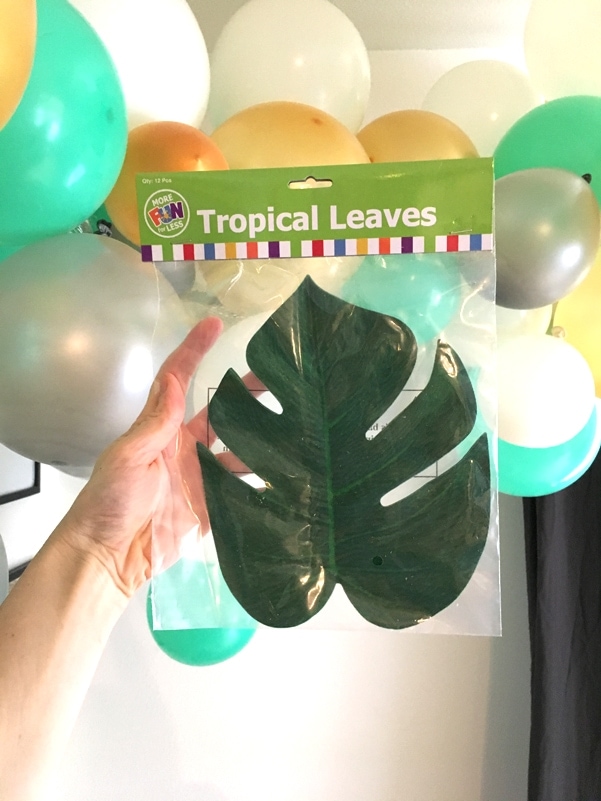 You could add any type of flowers and leaves, faux or real, to make your DIY balloon arch really stand out. These ones I got in bulk on Amazon were so lightweight and easy to stick with glue dots all over the place.
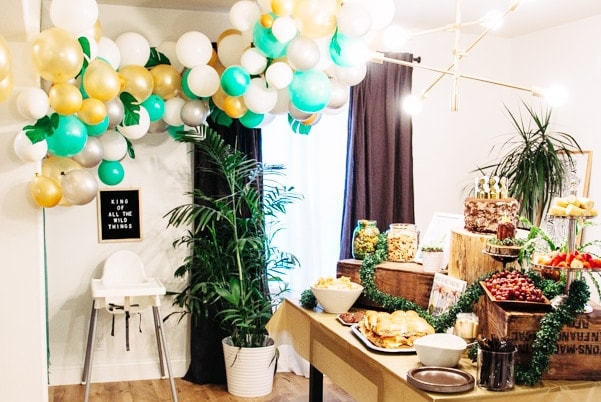
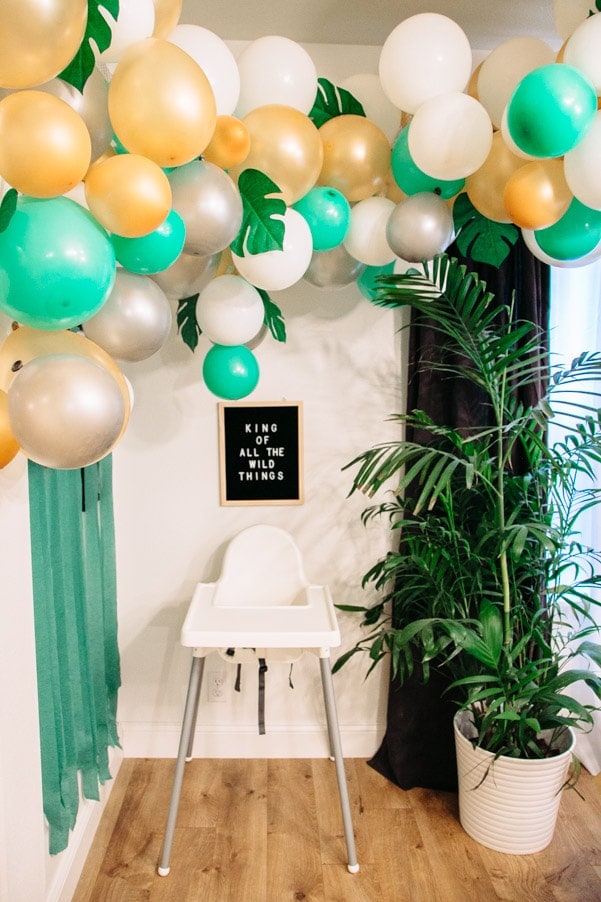
Friends, I was SO happy how it turned out. My husband had no idea what I was talking about when I said Balloon Arch and seeing where I was starting from, and was incredibly surprised at the end piece. (Thanks for the vote of confidence sweetie?? ;)
My party guests couldn’t even guess that chicken wire was holding it all together. And the command hooks stayed strong the whole time it was up. A crafting win!
If you have any questions, please ask below and I’ll do my best to fill in missing pieces and advice!


Liza Lee says
What a stunning balloon garland!!
Garland gives marvelous look to the party!!
Thank you for sharing this amazing tips with us